A real project
Time to try something more challenging, one with an outcome that you can appreciate and use.
The task is to install WordPress (WP for short) on your home server. WP is a content management system (CMS) and was written to make it easy to set up a blog. As so often happens, users found that it was also very easy to use WP to create attractive and functional websites even if they had never done this previously. WP is actually very easy to use, very adaptable - even the PCUG website uses it, so there's a good reference for it.
Let's get to work. The first task is to get the WP software. Go to [1], and download the current version. It is a bit under 5MB in its present form, and comes in .zip and .tar.gz formats. Choose the appropriate one for you.
Having stored the package, break it out from its compressed format. Now start XAMPP, go to the htdocs sub-folder and make a directory..being inventive, I'll call mine test
Copy the files and folders of the package to the test folder. If you were doing this on a distant server, you would FTP the files, but here you just copy them. A distinct advantage...
WordPress uses a MySQL database to hold all its content, so we need to create one for it. This introduces phpMyAdmin.
Open a web browser and revisit localhost to see the Welcome screen again. Look down the left-hand column for phpMyAdmin and click on it. Or (for future reference) type localhost/phpmyadmin in your browser.
phpMyAdmin is a tool for managing MySQL databases. It provides the means to make (and drop) databases, and make the tables that hold the data. For now, it is enough to know that we can make an empty database to use with WP. Let's do that.
This is the top part of the phpMyAdmin screen that you will have open. I've already populated the example, having selected a name for the database, a text collation (this ensures we get a language of choice). Then click on Create. The screen will signal that the database is being created, and if you check the left-hand column, you will see the new entry.
Now we go back to our file window. Go to htdocs/test/ and search for a file named wp-config-sample.php and open it in a text editor.
About 10 lines down you will need to tell WP how to find the database. Make the lines look like this:
// ** MySQL settings - You can get this info from your web host ** //
/** The name of the database for WordPress */
define('DB_NAME', 'wordpress');
/** MySQL database username */
define('DB_USER', 'root');
/** MySQL database password */
define('DB_PASSWORD', );
/** MySQL hostname */
define('DB_HOST', 'localhost');
/** Database Charset to use in creating database tables. */
define('DB_CHARSET', 'utf8');
Now save the amended file as wp-config.php, then close the text editor. As this is a local server, the username is the default 'root' and there is no need for a password.
OK, we are ready to roll. Back to your browser, and type in localhost/test/wp-admin/install.php and WordPress will take over and do just about everything else for you.
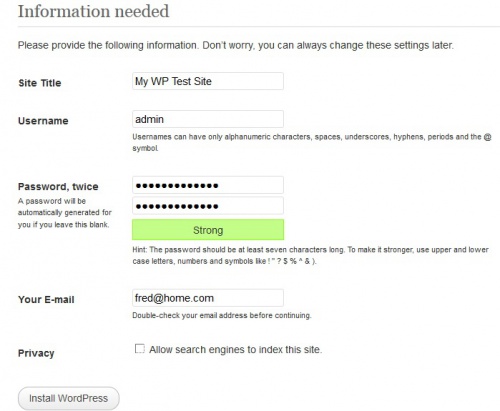
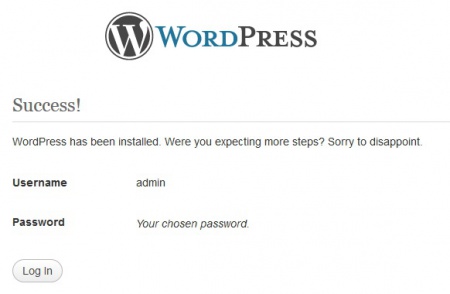
The first chore is to personalize your setup. Give your new site a name, change the admin name if you like, and select a password. Pop in your email address. If this was a live site, one open to the world, you could advertise it or not by ticking or unticking the last box. Then just click the 'Install WordPress' button. Don't sit back too far, because the installation will be over in a flash, and you will see
Congratulations.
WordPress will have created an example site for you, so go to your browser and type localhost/test to view it. You will also see there a place to log in, which will take you to the engine room (the 'back end') of WP so you can edit content.
There's a whole world of usefulness in having a home server, and being able to work in your own time - without the need for an internet connection - on your own projects.
 Break Glass for Help: Paul


